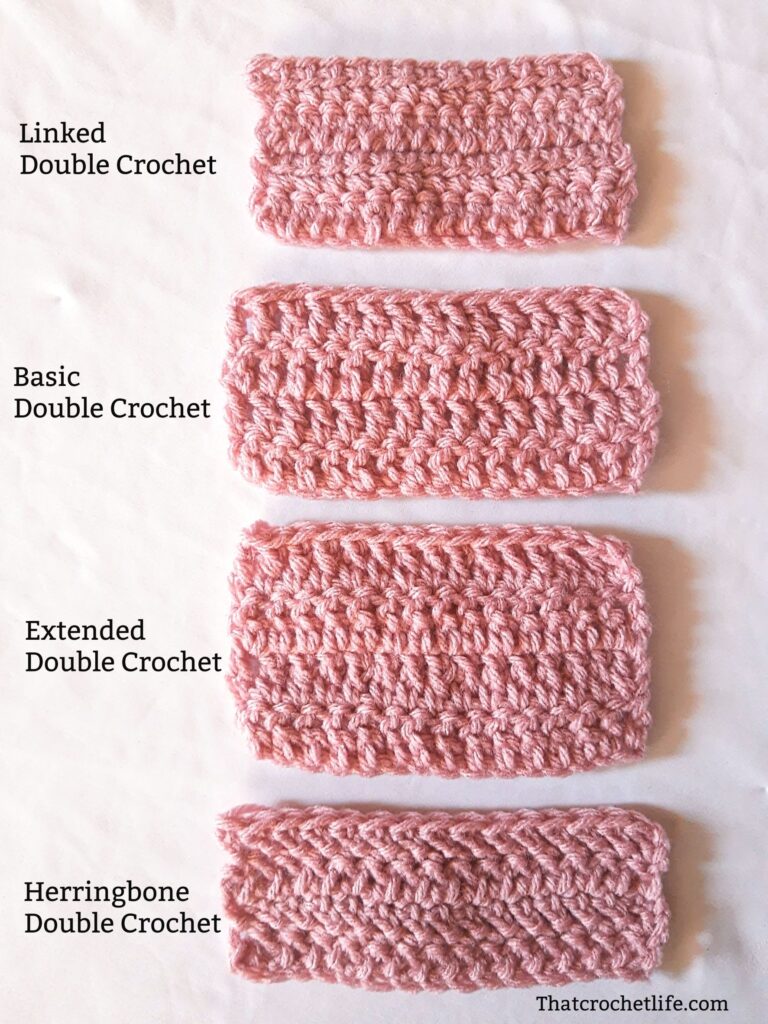
Have you ever wondered what the difference is between the different types of double crochet stitches? When I first started crocheting, I only knew the basic double crochet stitch, and when I would see a pattern that called for something other than this stitch, I would avoid it or try to get around it somehow. As I came across more and more patterns using these stitches, I had no choice but to dive in and learn them. As a result, I discovered that these stitches are actually very easy once you get the hang of them. The picture above shows the most common double crochet stitches: basic double crochet, linked double crochet, extended double crochet, and herringbone double crochet.
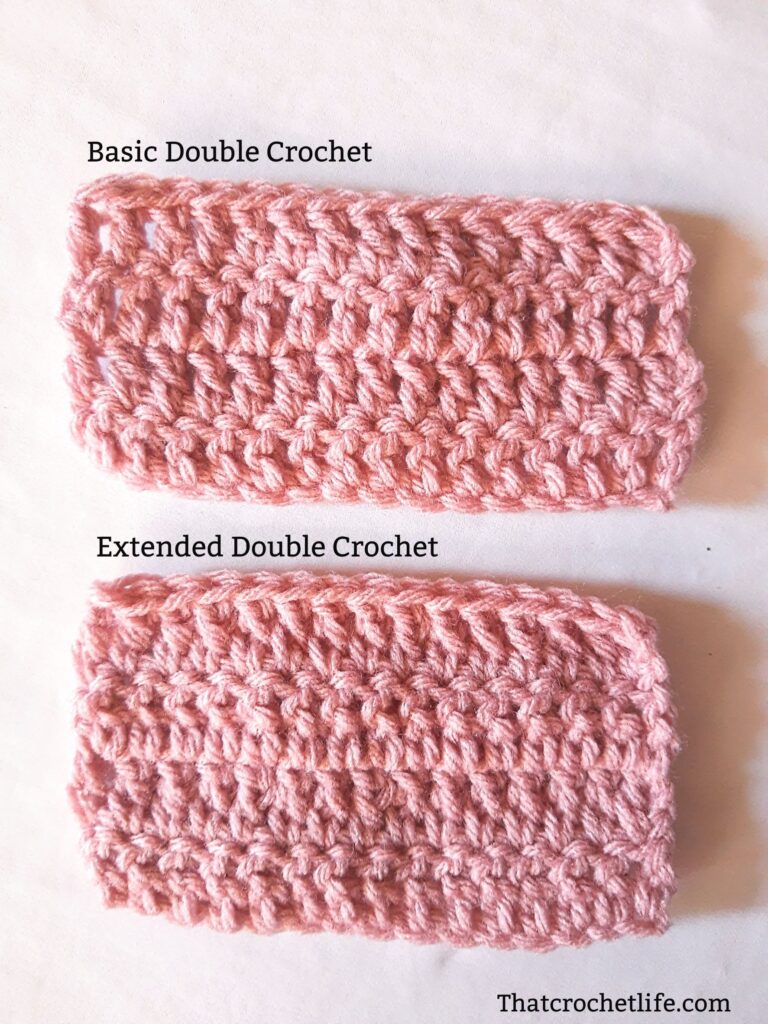
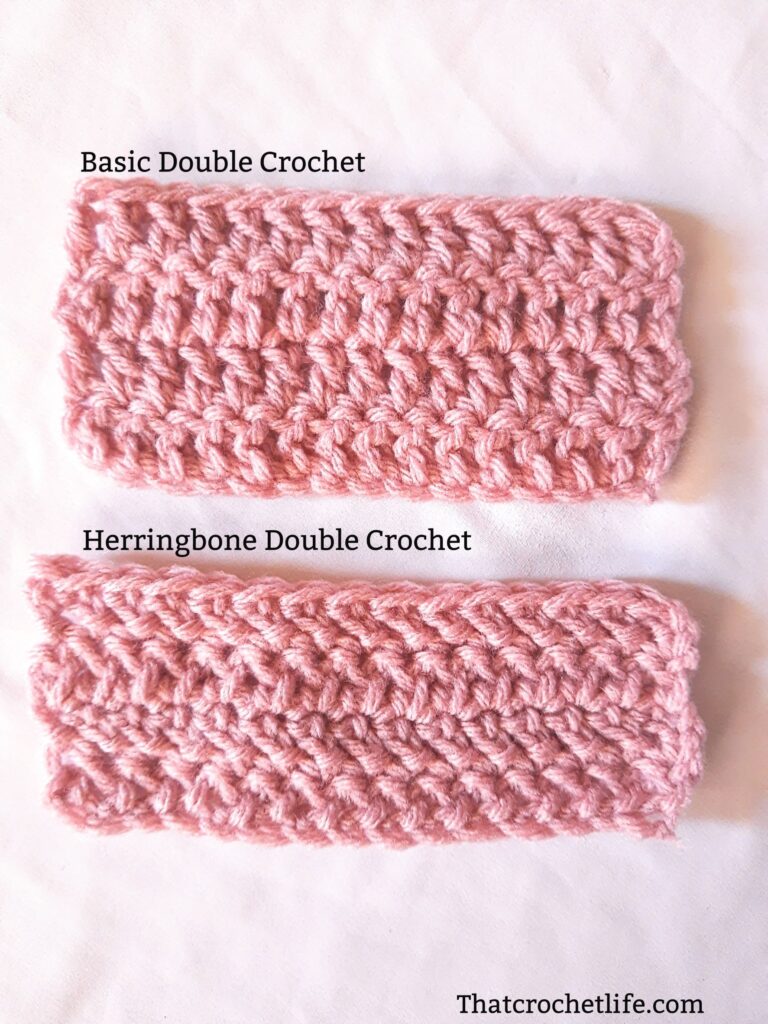
The linked double crochet stitch has stitches that are closest together, followed by the herringbone double crochet stitch. These two stitches are the best ones to use if you want to create a fabric that is tight with very few holes. The tallest stitch is the extended double crochet, and the shortest and widest stitch is the herringbone double crochet stitch. This is very useful information for designing garments or blankets. For a closer look, the following pictures show a comparison of each stitch to the basic double crochet stitch.
BASIC DOUBLE CROCHET vs. LINKED DOUBLE CROCHET

BASIC DOUBLE CROCHET vs EXTENDED DOUBLE CROCHET
BASIC DOUBLE CROCHET vs HERRINGBONE DOUBLE CROCHET
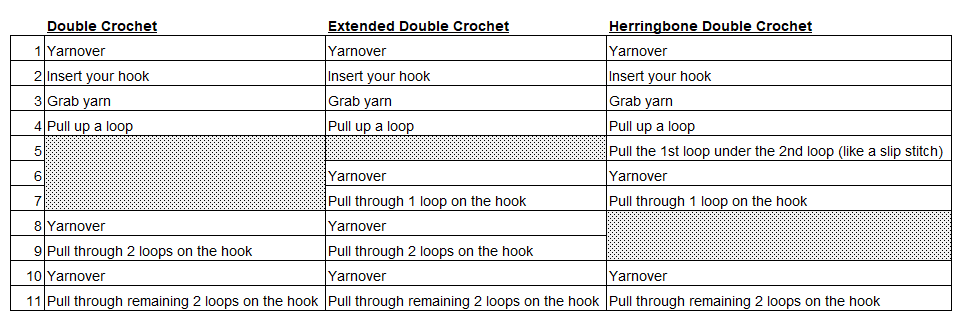
The chart below compares the steps for making each double crochet stitch. I think it helps to see them altogether, so that it’s easier to remember each one. The linked double crochet stitch is not on the chart; it’s better to watch a video on how to do it because where you insert your hook is different than the other stitches. To see it in action, check out this video on Instagram. I also recommend searching on Youtube.com for some great tutorials for all the stitches.
For more articles, click here.